Online Client Booking: Telegram, VK and Personal Website

The Clients & Finances app provides several tools for online client booking: a Telegram bot, a VKontakte community bot, and a personal booking website. All three tools work with the same schedule in the app. The chatbots allow you to communicate with clients directly in messengers. This is not an AI assistant — it's a flexible, fully customizable tool with the following features:
- Collecting the information you need before the first appointment (name, contacts, important details...)
- Informing clients about your services (address, terms, payment, preparation...)
- Messaging clients like in a regular chat
- Automatic appointment booking
- Notifying clients about upcoming appointments
- Sending bulk messages to your client base
You can explore the booking tools at the following links:
- VK bot — https://vk.com/clients_finances — open the community messages and chat with the bot.
- Telegram bot — https://t.me/ClientsAndFinancesBot
- Personal booking website — https://clients-finances.pro/book/clients — an example booking page.
This article describes how to configure a chatbot that is already connected to a platform. To connect a VK bot, see the instructions here. To connect a Telegram bot, read this guide.
Chatbot Features
Telegram and VK bots allow your clients to:
- Book available time slots in your schedule independently
- Get information about your services and prices
- Choose a convenient time from available slots
- Receive booking confirmation
- Interact with you through a familiar messenger
On your side, you can:
- Send messages to all clients at once
- Confirm or decline bookings
- Collect contact information and client data automatically
Personal Booking Website
In addition to chatbots, the app gives you a personal booking website — a web page with your schedule, accessible via a unique link. Clients open it in their browser and book an appointment themselves, without any messenger.
Example booking website: https://clients-finances.pro/book/clients
How it works:
- You add available time slots to your schedule in the app
- A client follows your personal link and sees the available times
- The client selects a convenient slot and leaves their details
- You receive a notification about the new booking and confirm it
Share the link on social media, business cards, email signatures, or anywhere else. Your website address is generated automatically when you enable the feature in the app settings.
Core Bot Settings
1. Welcome Message
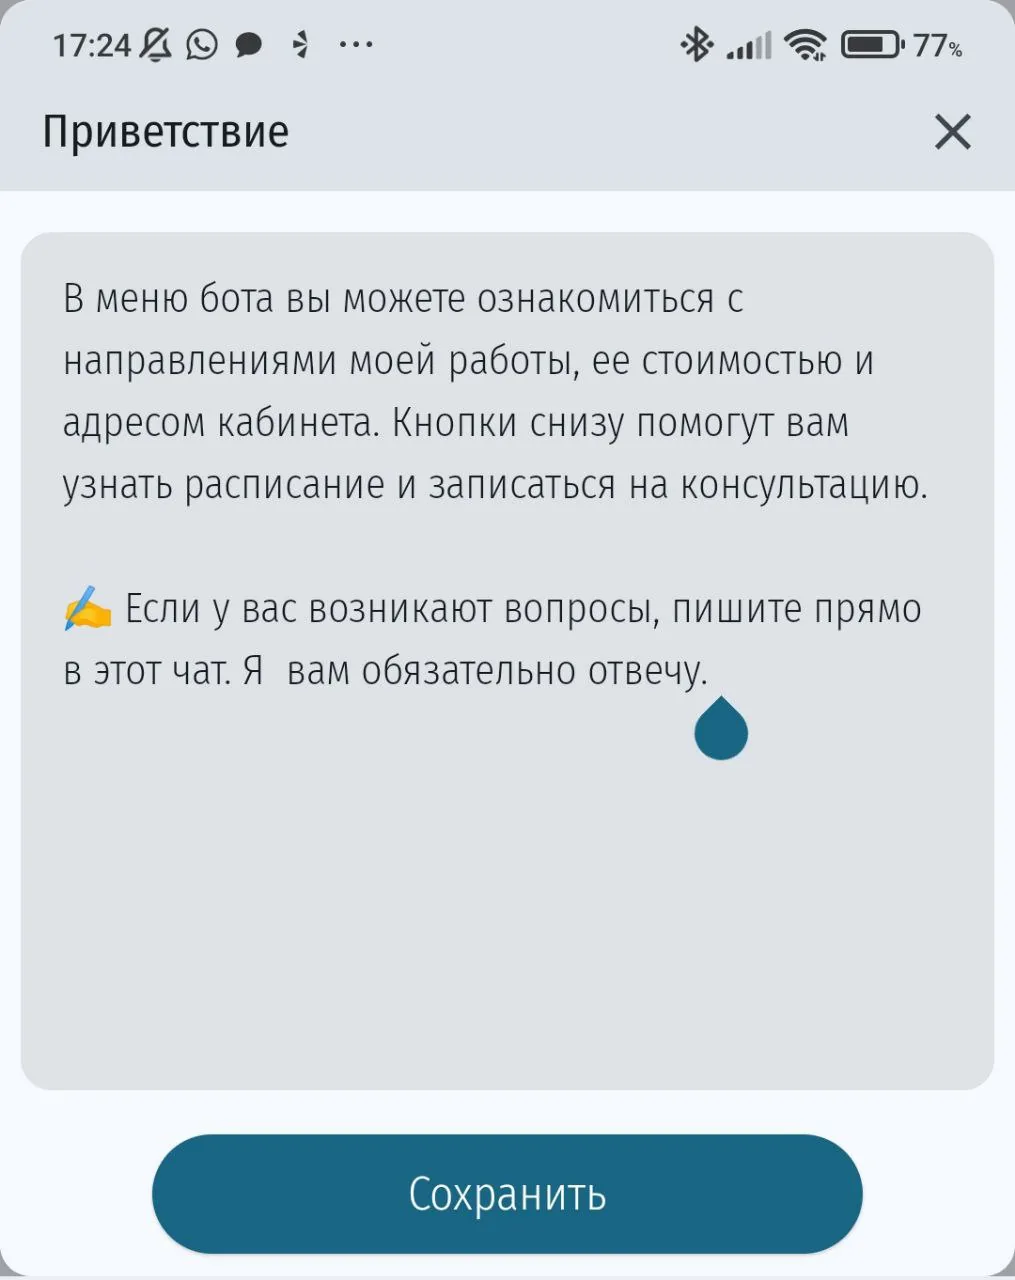
This is the first thing a client sees when they follow your bot link.
Click on the "Welcome" block and enter text that creates the right first impression of your service.
Recommendations:
- Introduce yourself and describe what you do
- Briefly explain what the client can do through the bot
- Use a friendly tone
- Keep it concise — clients may not read a long message
- Use emojis for visual separation (in moderation)
- Make it clear that the bot is an automated tool
2. Booking Confirmation
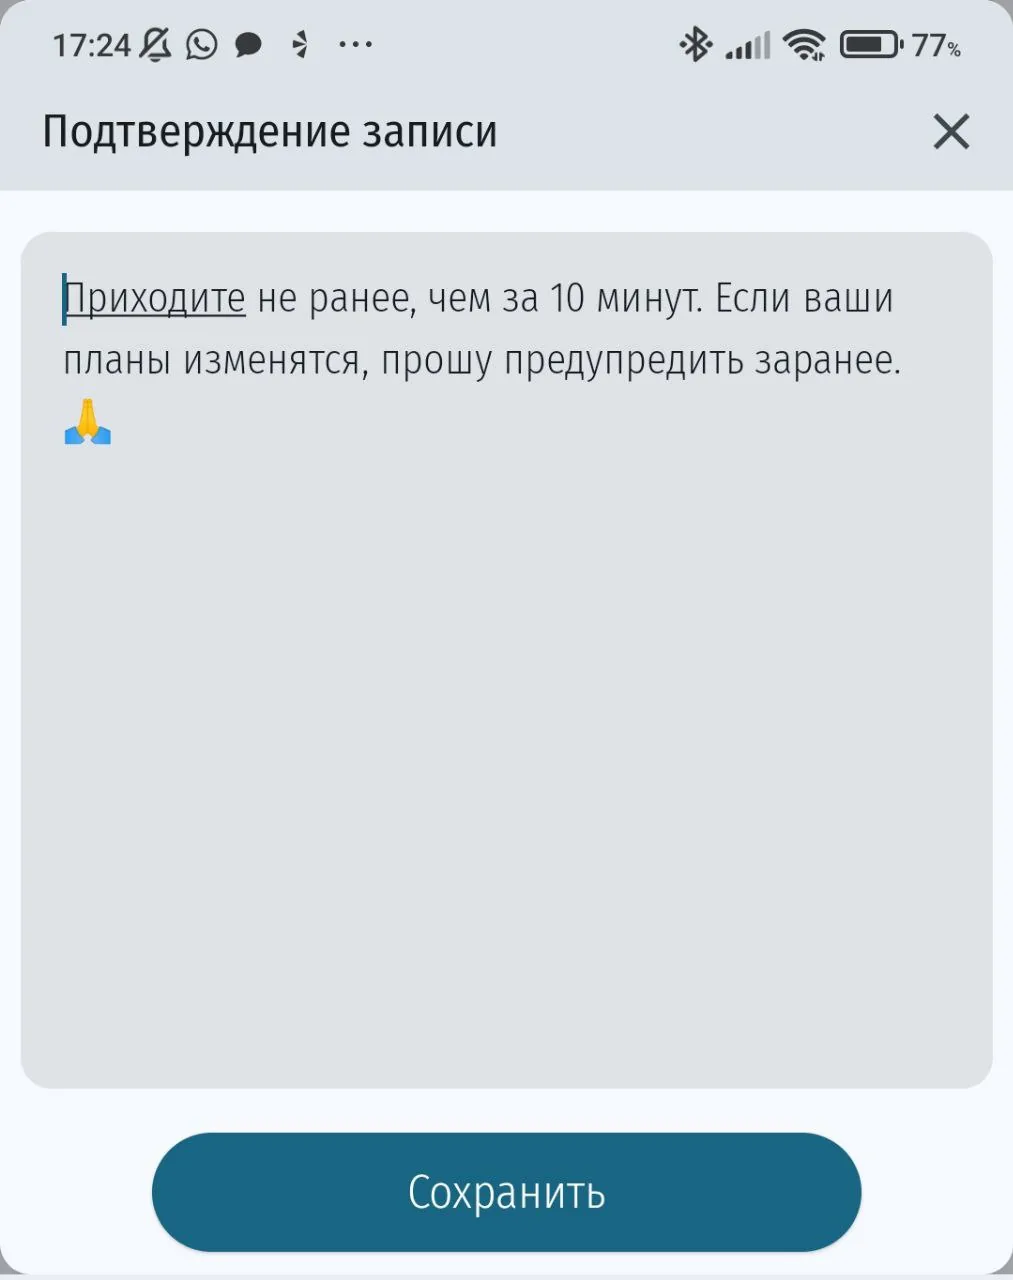
The message a client receives after you confirm their booking.
How to configure:
In the "Booking Confirmation" block, write the notification text.
Recommendations:
- Thank the client for booking
- Include the address or other important details
- Add a contact phone number in case rescheduling is needed
3. Bot Menu
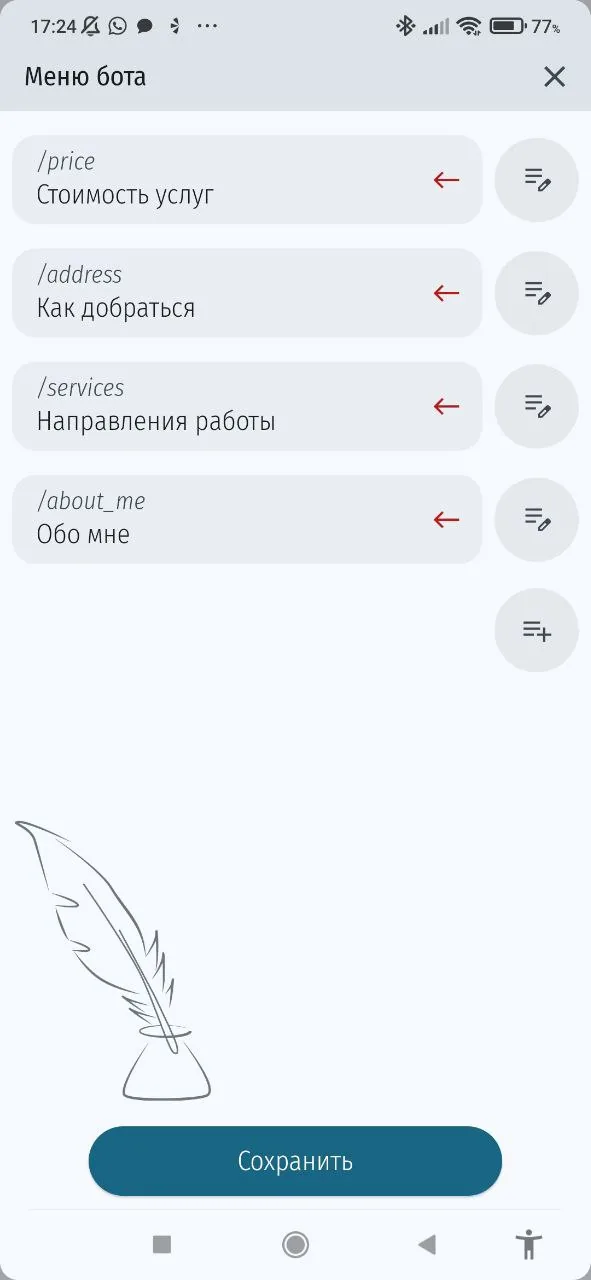
An interactive menu with commands available to clients directly in the chat.
How to configure:
- Click on the "Bot Menu" block
- Add commands (no more than 10)
- For each command specify:
- Command (English, lowercase, digits and underscores allowed, e.g.:
/price,/location) - Description (what the client sees in the menu)
- Message (text sent to the client when they select the command)
- Command (English, lowercase, digits and underscores allowed, e.g.:
Useful command examples:
/price"View prices" → list of services and prices/location"Where I am" → address and directions/contacts"Contact me" → phone, email, social networks/works"My portfolio" → link to portfolio or Instagram/cancel"Cancel booking" → cancellation instructions
Recommendations:
- Add a command with your contact details
- Plan a logical command structure
- Regularly update information (prices, address, working hours)
4. Contact Collection
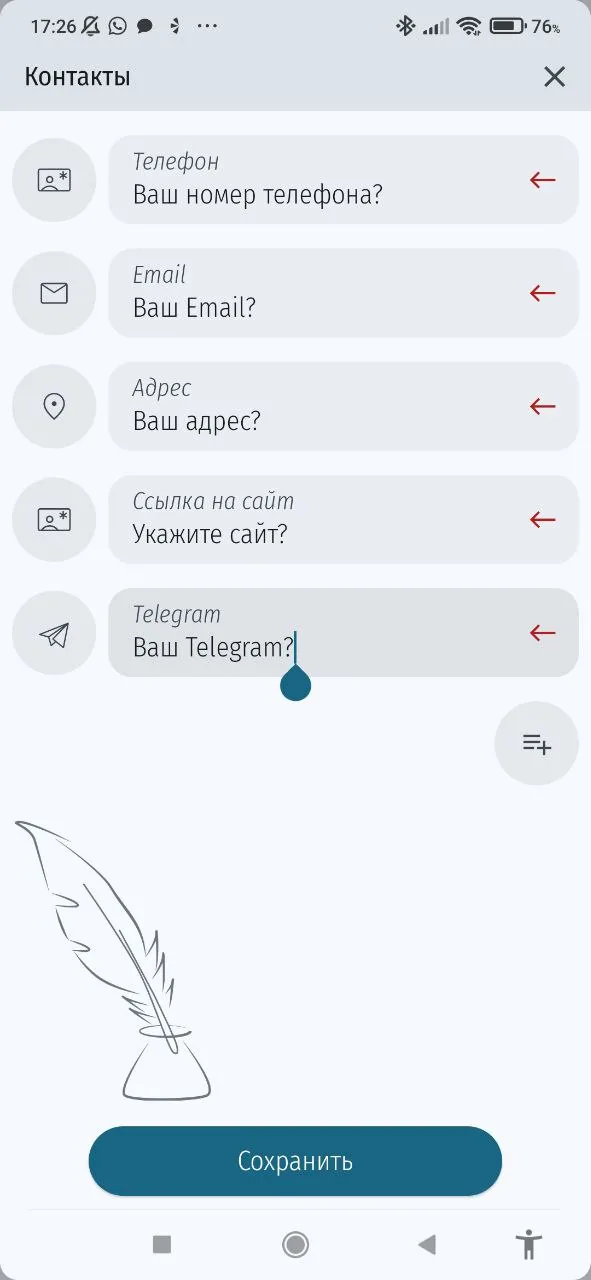
Automatic collection of client contact details at their first booking.
How to configure:
- Click on the "Contacts" block
- Choose which contacts to collect (phone, email, address, etc.)
- Edit the question for each contact type
Recommendations:
- Only ask for information you actually need
- Phrase questions politely and briefly
Result: All contacts provided by the client are automatically added to their card in the app.
5. Additional Client Information
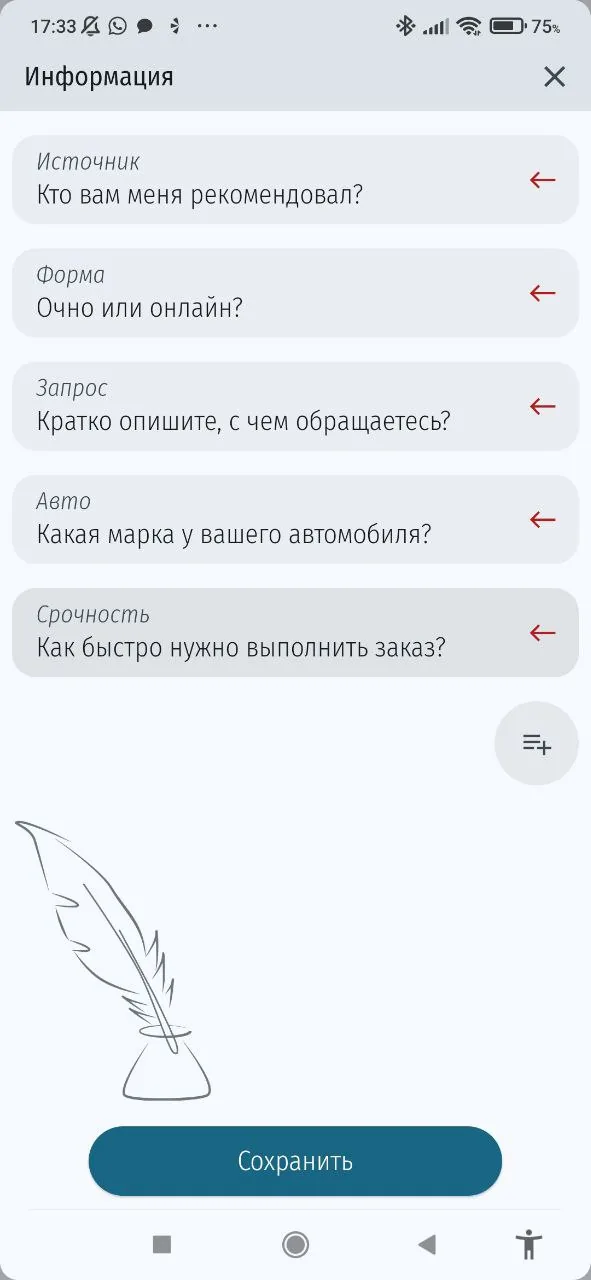
Collecting important information about the client and their preferences.
How to configure:
- Open the "Information" block
- Add questions whose answers help you prepare for the appointment
- Edit the wording of each question
Useful question examples:
- For a nail technician: "Any allergies to materials?"
- For a hairdresser: "Have you colored your hair before?"
- For a cosmetologist: "What is your skin type?"
- For a photographer: "What shooting style do you prefer?"
Result: Answers are saved in the "Information" block of the client's card.
6. Services and Pricing
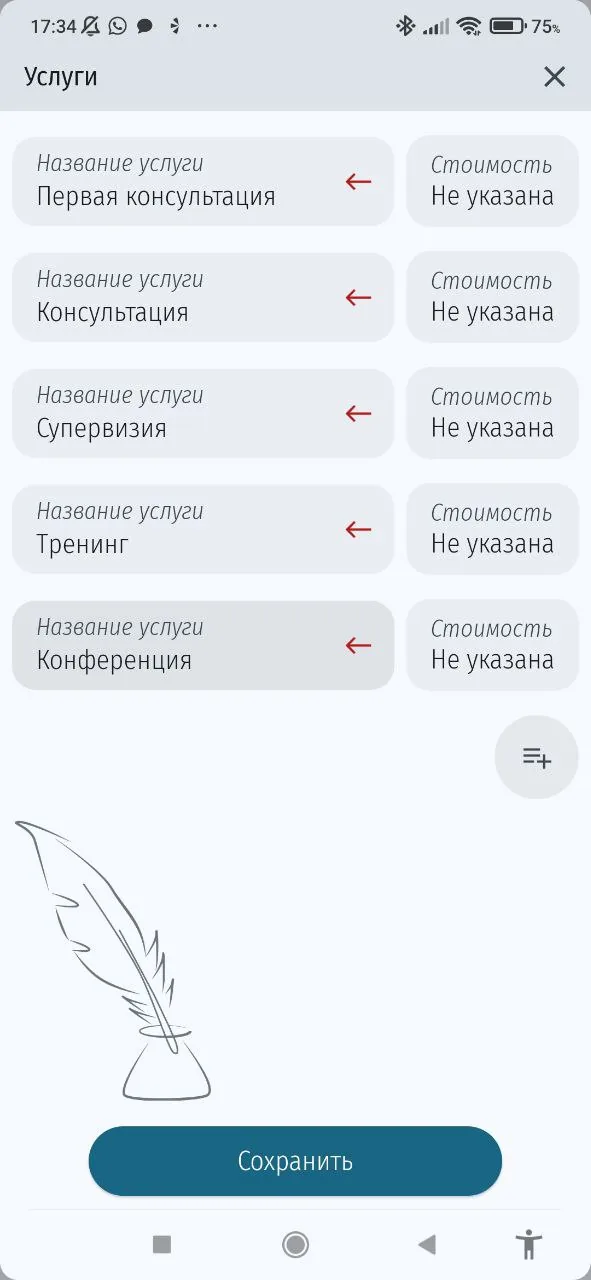
Displaying available services with prices in the bot so clients can choose when booking.
How to configure:
- Click on the "Services and Pricing" block
- Add your services with names and prices
- Leave the price blank if you prefer to discuss it individually
Result: When booking, the client selects a service, and it is automatically added to the appointment card.
7. Bulk Messaging
Sending a message to all your clients at once.
How to use:
- Click on the "Send Message" block (for Telegram or VK separately)
- Enter the message text
- Send
When is this useful:
- Notifying about schedule changes
- Announcing promotions and special offers
- Holiday greetings
- Information about new services
Booking Scenario
- Client follows the link
- Receives a welcome message with information about your services
- Selects a date and time from available schedule slots
- Selects a service from the configured list
- Answers questions about contacts and additional information
- Receives confirmation that the booking request has been sent
- You receive a notification about the new booking
- You confirm the booking — the client receives a confirmation notification
Schedule Integration
- Add available slots to your schedule so clients can book
- Appointments created through the bot automatically appear in your schedule
- Client cards are created automatically after the first booking
- All client information is saved in their card
Data Synchronization
Important: Bots require data synchronization with the server. Make sure that:
- You have an active Pro subscription
- Synchronization is enabled in the security settings
- The app regularly syncs with the server
Conclusion
A well-configured chatbot becomes an effective tool for automating client bookings. Take the time to thoughtfully fill in all settings sections — and you'll significantly reduce time spent on routine client communication, freeing it up for actual work. Regularly review your settings, adapting them to changes in your business and client feedback. Good luck with automation!